 USA AI Tools
JPG vs PNG vs WebP: Which Image Format Should You Use?
 By Naumann Nasir · Last updated
Picking an image format feels like a small decision, but it decides how fast your page loads, whether a logo keeps its transparent background, and whether a photo arrives as a sensible 200 KB file or a 12 MB monster. The three formats most people choose between are JPG, PNG and WebP. Each is good at something different.
Instead of repeating general advice, this guide runs the same images through the free Image Format Converter, Image Compressor and Image Resizer on this site and reports the real file sizes. All three tools work inside your browser, so the files never leave your computer.
The test images
We used two images that represent the two most common jobs on a website:
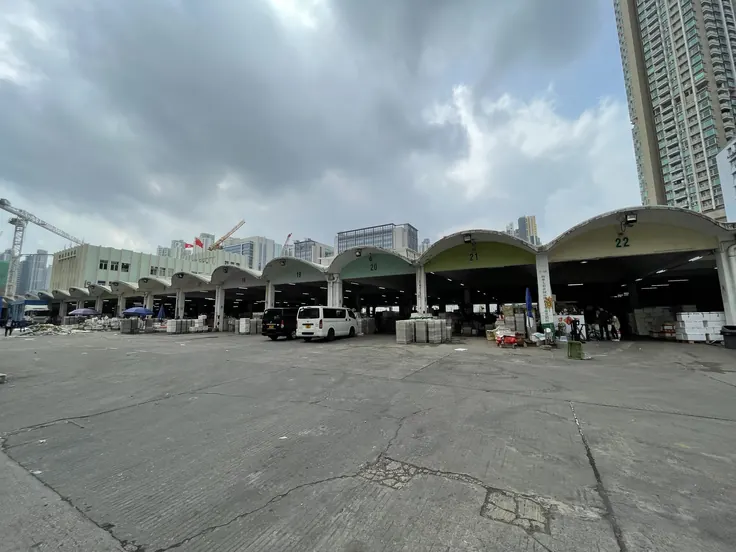
- A photo: a 3840 x 2880 pixel JPG of a vegetable market in Hong Kong, taken on a phone. The original file is 1.64 MB. (Photo: "Cheung Sha Wan Wholesale Vegetable Market, Hong Kong" by Msh.spike, released into the public domain under CC0 on Wikimedia Commons.)
- A screenshot: a 1280 x 1300 pixel PNG screenshot of one of our tool pages, with text, buttons and flat colours. The original is 157.0 KB.

A quick summary of the three formats
- JPG (JPEG) uses lossy compression designed for photographs. It throws away detail the eye is unlikely to notice. It has no transparency, and every re-save loses a little more quality.
- PNG is lossless: every pixel is stored exactly. It supports transparency and keeps sharp edges on text and logos, but photos saved as PNG are very large.
- WebP was developed by Google for the web. It can be lossy or lossless, supports transparency, and is supported by all current major browsers. Our tools export WebP in lossy mode.
Test 1: Converting the photo
We converted the 1.64 MB photo to each format with the Image Format Converter, which keeps the original dimensions and exports JPG and WebP at 92% quality.
- Photo to PNG: 12.59 MB. The file became almost eight times larger. PNG has to store every pixel of a busy 11-megapixel photo exactly, and photos have very few repeated patterns to compress.
- Photo to WebP: 1.58 MB. Only slightly smaller than the original, because 92% is a high quality setting and the image is still 3840 pixels wide.
Lesson: never save photographs as PNG for a website. And changing format alone does not make a huge photo small. The bigger win comes from resizing and choosing a sensible quality, which is the next test.
Test 2: Compressing and resizing the photo
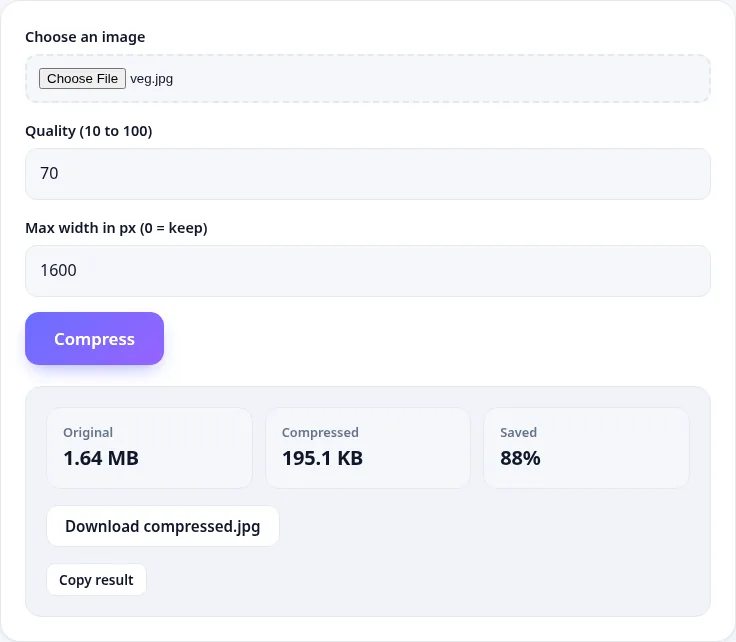
Most web pages display photos at well under 2000 pixels wide, even on large screens. A phone photo at 3840 pixels wide carries detail nobody will see. The Image Compressor lets you set a quality from 10 to 100 and an optional maximum width.
| Settings | Output | File size | Saved |
|---|---|---|---|
| Quality 70, full size (3840 px) | JPG | 986.6 KB | 41% |
| Quality 70, max width 1600 px | JPG | 195.1 KB | 88% |
| Quality 80, max width 1200 px | JPG | 157.5 KB | 91% |
| Image Resizer: 1200 px wide, WebP | WebP | 238.6 KB | about 86% |
Two things stand out. First, resizing does far more than quality alone: going from 3840 to 1600 pixels wide took the file from 986.6 KB to 195.1 KB at the same quality. Second, the WebP from the Image Resizer is larger than the 1200-pixel JPG from the compressor. That is not because WebP is worse; the resizer exports at a fixed high quality of 92%, while the compressor used 80%. When you compare formats, compare them at similar quality settings.
For a typical blog or product photo, a width of 1200 to 1600 pixels and a quality of 70 to 80 is a sensible starting point. Always open the result and look at it at full size before you publish. Faces, fine text and smooth skies show compression problems first.
Test 3: Converting the screenshot
Screenshots behave very differently from photos. They have large areas of flat colour and sharp text, which lossless compression handles well.
- Screenshot PNG to JPG: 157.0 KB became 154.7 KB. Almost no saving, and JPG compression can add faint blotches around text.
- Screenshot PNG to WebP: 157.0 KB became 83.1 KB, a reduction of about 47%, with the text still crisp at 92% quality.
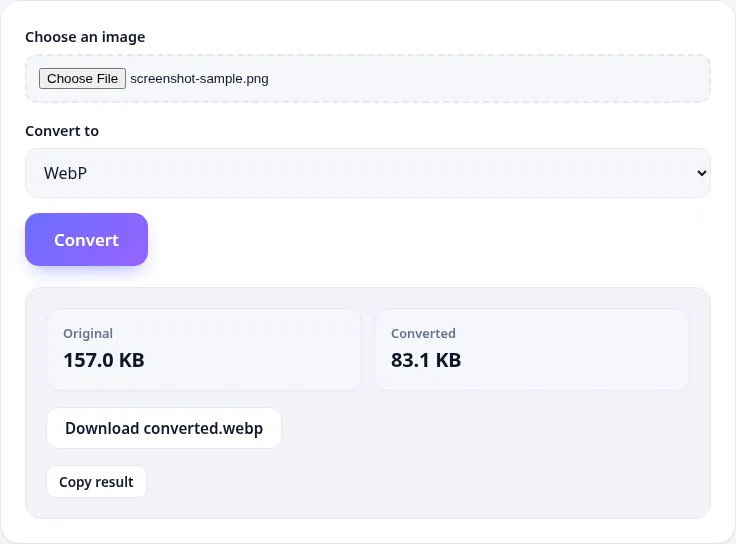
Lesson: for screenshots, diagrams and interface images, PNG or WebP beat JPG. WebP gave the smallest file here.
Which format should you use?
Use JPG when
- you are sharing photos by email or uploading to a platform that recompresses images anyway;
- you need maximum compatibility with older software, printers or forms that reject WebP;
- the image is a photograph with no transparency.
Use PNG when
- you need a transparent background, for example a logo placed on coloured sections;
- the image contains text or sharp lines and you want zero compression artefacts;
- you are keeping a master copy to edit later.
Use WebP when
- the image is going on a website you control, whether it is a photo or a graphic;
- you want smaller files for faster pages;
- you need transparency but a smaller file than PNG.
A simple workflow for website images
- Keep your original. Every lossy save throws away detail you cannot get back, so always work from the original file.
- Resize to the largest size the page displays. If your blog column is 760 pixels wide, a 1520-pixel image covers high-density screens. Use the Image Resizer with the height set to 0 to keep proportions.
- Compress. Run the result through the Image Compressor at quality 70 to 80. JPG inputs stay JPG; PNG and WebP inputs are saved as WebP.
- Convert graphics to WebP. Use the Image Format Converter for screenshots and illustrations.
- Check it. Open the final file at 100% zoom. If you see blocky areas or halos around text, go up 10 quality points.
Our earlier guide, How to Compress Images Without Losing Quality, goes deeper into quality settings and how to judge compression by eye.
Common questions
Is WebP supported everywhere?
All current versions of Chrome, Edge, Firefox and Safari display WebP. Some older desktop software, email clients and upload forms still reject it, so keep a JPG or PNG copy for those cases.
Does converting JPG to PNG improve quality?
No. PNG will store the JPG's pixels exactly, including any compression artefacts, and the file will be much larger. You cannot recover detail that was removed when the JPG was saved.
What about transparency when converting to JPG?
JPG has no transparency, so our tools fill transparent areas with white. If your logo sits on a coloured background, use PNG or WebP instead.
Are my images uploaded when I use these tools?
No. The compressor, resizer and converter draw your image on a canvas inside your browser and create the new file on your device. Note that this process does not keep camera metadata such as location, which is often a privacy bonus.
The short version
Photos: resize first, then save as JPG or WebP at quality 70 to 80. Screenshots and graphics: WebP or PNG. Logos with transparency: PNG or WebP. In our tests, resizing a phone photo to 1600 pixels at quality 70 cut it from 1.64 MB to 195.1 KB, and converting a screenshot to WebP cut it nearly in half. Those two habits alone will make most pages noticeably faster.
More free images & design tools
Image Compressor
Shrink JPG, PNG and WebP files in your browser. Nothing is uploaded.
🎨Image Resizer
Resize images to exact pixels or by percentage.
🎨Image to Base64
Convert an image into a Base64 data URL.